Natural-looking extensions usually come down to placement, texture and restraint. This guide explains how to apply them so the finish feels believable and comfortable.
Natural-looking extensions rarely depend on one trick alone. The result usually comes from choosing the right texture, placing each weft in the right zone, and blending with a lighter hand than most people expect. People looking up this topic want quick help before buying or before their first try, especially if they worry about visible clips, bulky roots, or ends that do not match.
Why Clip-on Hair Is Popular for Everyday Styling
Clip on hair remains popular because it gives flexibility without glue, bonding, or salon maintenance. Cliphair UK positions clip ins as a quick option for volume and length, with one-piece styles taking only a few minutes and full sets usually taking around ten to fifteen minutes once you know your routine.
Another reason is control. People can skip a full transformation and use only a few pieces where hair looks sparse. Fine-haired people say it looks more realistic to use fewer wefts than to use every piece in the pack. Some say three pieces give enough fullness for daily wear, while heavier sets feel better saved for longer looks or special occasions.
Quality also changes the finish. Cliphair UK states that its clip-ins are made from 100 percent Remy human hair, which keeps the cuticle aligned and allows styling with heat tools when used carefully. Human hair tends to move more naturally, hold shape better, and blend more convincingly in daylight than shinier synthetic fibres.
Step-by-Step Guide to Applying Clip-on Hair Extensions
Preparing Your Natural Hair
Start with dry hair that has some grip. Freshly washed hair can be too silky, so many people find that second-day hair holds clips better. Brush through your own hair first, then brush the extension pieces separately from the ends upward so you are not forcing knots into the weft. Cliphair UK also advises detangling gently before wear and before washing for better longevity.
The best natural result typically starts before you even open the first clip. Match the extension texture to your own hair rather than planning to fix everything later with heat. Straight sets work well for smooth hair, while textured or curly options reduce the amount of blending needed.
This is also where choosing the right hair extension with clips matters. For thinner hair, Cliphair UK notes that seamless styles and moderate lengths often sit flatter and feel easier to disguise instead of long, heavy pieces. A useful rule is to treat volume first and length second. When the added hair suits your natural density, the finish usually looks more expensive and more believable.
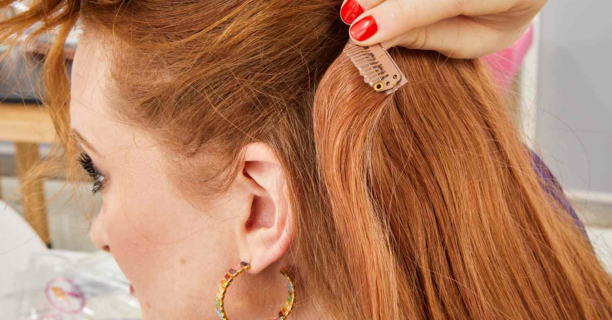
Sectioning and Placement Techniques
Most first tries go badly with sectioning. Start lower than you think you may need to, somewhere near the nape, maybe, and from there, build upward in clean horizontal lines. Forum advice repeatedly highlights this point because clips placed too high show at the crown or peek through at the sides, especially in fine hair. Leave enough natural hair on top to cover the rows. That upper curtain is what makes the installation disappear.
If your hair is fine, backcomb lightly at the root or use a small amount of grip product before fastening the clips. Cliphair UK also recommends placing clips slightly lower on the head for finer hair, since the highest sections are usually the sparsest and hardest to conceal.
Do not feel pressured to use the entire set. Many hair extensions for women look better when the placement is edited to suit real density. Side pieces should sit where your own hair still has enough coverage. If the temples are naturally fine, skip that area and focus on the back and lower sides instead.
Blending for a Seamless Finish
Once the pieces are in, resist heavy brushing straight away. Use your fingers first to merge your own hair with the extensions, then brush lightly. If the line between them still looks obvious, add loose bends or soft curls through both sections together.
A helpful detail that often gets missed is placement by haircut shape. If your own hair has blunt ends, extra long extensions can create a shelf effect where natural hair sits on top of the added length.
A better option would be to pick a length that is closer to your existing cut or ask a stylist to make the ends of the extension softer so that the change looks intended. That small adjustment often creates the most natural change in the whole routine.
Styling Tips to Make Extensions Look Natural
Heat styling can help, but restraint matters. Cliphair UK says Remy human hair clip ins can be curled, straightened, and blow dried, but recommends heat protectant and temperatures below 180 degrees Celsius. Styling the extensions before clipping them in often gives better control, so you can lightly touch up once everything is in place.
Shade matching deserves just as much attention as technique. Cliphair UK offers more than 65 shades and a photo based colour matching service, which makes sense because even perfect placement cannot hide a colour mismatch. People say that the best sets are not always exact in the packet, but blend better once mixed through the natural hair.
Care affects realism, too. Cliphair UK advises washing clip ins only when needed, often around every 12 to 15 wears, with sulphate free shampoo and hydrating conditioner through mid lengths and ends. Air drying flat and storing them in a breathable case helps them keep shape and softness, which makes every later application easier.
Common Mistakes Beginners Should Avoid
The first mistake is choosing too much hair. Online, thick, glamorous sets can appear great, but on real heads, they often make the roots look bulky or the ends look obviously denser. People often say that utilizing fewer wefts makes the hair softer, especially if the natural hair is fine or shoulder-length.
The second problem is not taking care of your hair and making sure it's comfortable. Clip ins are considered one of the least damaging methods but only if they are applied and removed properly. Sleeping in them, yanking them out, or fixing them to the same fragile spots every time can create unnecessary tension.
Cliphair UK advises opening each clip fully before removal and rotating placement to reduce stress on the same strands.
Frequently Asked Questions
Can Clip-on Hair Work on Thin Hair?
Yes, but building things with lighter materials usually works better. Cliphair UK says that seamless wefts and moderate lengths often lay flatter on fine hair. People on forums also remark that putting the wefts lower and lightly backcombing them makes them easier to hold without making the top look bulky.
Can You Curl or Straighten Clip-in Extensions?
Yes, when the set is real Remy human hair. Cliphair UK recommends using heat protectant and keeping tools below 180 degrees Celsius to avoid drying the ends over time.
How Often Should Extensions Be Washed?
Not after every wear. Cliphair UK advises washing only when necessary, often every 12 to 15 wears, then air drying flat and storing them carefully between uses.
How Long Do Clip-Ins Usually Last?
With solid care, high quality Remy clip ins often last around 6 to 12 months, and sometimes longer with lighter wear and careful storage. Longevity usually depends on heat use, washing habits, and how gently the wefts are handled.
A natural looking clip on hair rarely comes from piling in more pieces. It comes from matching texture, choosing realistic density, and placing each row where your own hair can actually hide it. People who take that calmer approach usually get the result they wanted from the start. Keep an eye on Cliphair’s tutorials and education pages for practical extension tips. If you want a discount on your clip in purchase, go and check out Cliphair Promo Codes.
For more on haircare and beauty, follow EliteCart.